Wednesday, July 27, 2011

Summer Mango Tart


  Summertime is fruit eating season, and there’s nothing more summery and delicious than a ripe, juicy mango.  The sweet and supple flesh, the heady flowery fragrance- to me a good mango tastes like pure slices of heaven encased in a fiery-red skin.
  But a good mango is as elusive as a shimmery mirage, and finding one around here can be as frustrating and useless as trying to catch a fistful of bright sunshine.  I’ve been spoiled by too many long afternoons spent on my grandmother’s terrace in Hyderabad with sticky lips and orange nectar dripping down my forearms to be satisfied with stringy fibrous things they sell at the fruit stands at 14th street, those sad fruits that begin to rot before they’ve ever even ripened. 
  I had all but given up hope on ever capturing that sweet intoxicating flavor on this side of the Atlantic, but my mother has finally come back home and with her return I’ve regained access to some of the best Asian markets in New Jersey, the motherland.  Last time I went to visit she sent me home with a ripe bagful and I’ve been feasting ever since! 

  A ripe mango doesn’t need anything to make it better, and the best way to eat it is raw- to showcase this jewel of a fruit at its very best, I baked off this crispy phyllo shell and topped it with a tangy sweet cream.  The lime zest plays off the sweetness of the mango and heightens the flavor to dangerous levels of knee-weakening deliciousness.  Make sure you are sitting down to eat this one!
Mango Tart
1          ripe mango, peeled and sliced thin
6          sheets phyllo dough
¼ c      melted butter
            sugar

Tangy Cream
4 oz     cream cheese
½ c      low-fat yogurt
¼ c      sugar or honey
1          lime, zest and juice
pinch   salt       

1.  Thaw frozen phyllo pastry dough according to the package instructions- 2 hrs at room temp or overnight in the fridge.  Before you start, make sure your station is set up with a damp towel, a small bowlful of sugar, some melted butter and a pastry brush, and a baking sheet lined with a silpat or parchment paper sprayed with Pam.
2.  Carefully unroll the phyllo dough and immediately cover it with a sheet of plastic wrap and the damp towel.  Phyllo sheets are incredibly thin and will start to crack if you let them get dry, so be sure to replace the towel each time you remove a sheet.


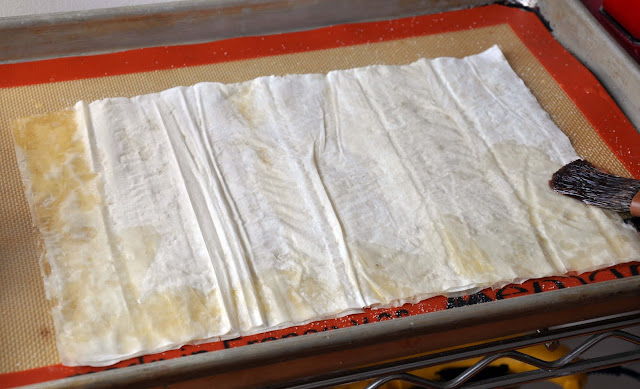
3.  Put the first sheet of phyllo down on the baking tray and gently brush it with a thin layer of melted butter.  Sprinkle a fine dusting of sugar over the pastry, then place another sheet on top.

4.  Repeat the butter/sugar process until you have five or six sheets- brush the top layer with butter but don’t sprinkle it with sugar.  I folded the edges in to give it a finished look, but you also can bake as is.

5.  Bake the tart shell at 350° F for 12-18 minutes, until the pastry has turned a deep golden brown color.  During the baking process, the butter between layers will crisp the crust and the evaporating liquid in it will cause the pastry to rise like a quick puff dough. 

6.  While the pastry cools, whisk together the cream cheese, yogurt, lime juice and zest, sugar to taste, and a pinch of salt.  You can experiment with strained Greek yogurt, sour cream, goat cheese, or anything else you think might taste good with the fresh fruit.
7.  When the pastry is completely cool, spoon the cream mixture evenly over the crust, then placed the sliced mango on top.  Finish with a dusting of lime zest.

  The combination of crunchy pastry, tangy sweet cream and fresh fruit at its peak is a wonder of taste and texture, and this tart is a great quick dessert that will work well with any type of ripe fruit or berry, so get creative and enjoy!

Thursday, July 21, 2011

Fried Rice For Rao

   We were raised in the land of plenty where we often throw away more food than we consume-  but being the child of immigrants, there was no sin more heinous than “waste” according to my grandmother.  Maybe that is why there are few things more satisfying to me than cleaning out my fridge.

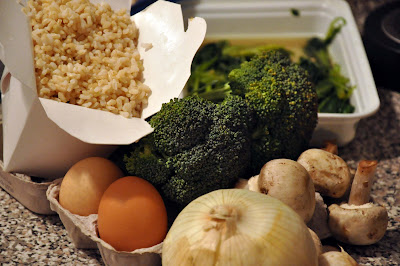
  I hate throwing out perfectly good food, so when the veggies are starting to wilt in the crisper and the Chinese food containers of hardened rice are accumulating on the shelf, it’s time to throw together a quick fried rice.  Reappropriating leftovers is an exciting challenge that tests the skills of any home cook- how can you make last night’s dinner fun and new?  Get creative with spices and sauces, and don’t be scared- no one is watching but you!

  1. Heat some oil in a pan or wok and sautee onions, garlic and ginger over medium-high heat.  Add your chopped veggies and/or meat and cook them.
2. Break up the rice and add it to the pan with a good knob of butter- sprinkle soy sauce over top. 

3. I don’t have a proper wok, so I use a second pan to fry up a few eggs on high heat.  I use a spatula to chop them up, then add them to the rice. 


4. Cook the fried rice until it is tender and delicious and the flavors have come out to play.

  Cooking is all about practice and tasting, and above all going with the flow.  Forget the rules, just throw it in a pan and see what happens- chances are you’ll be happy with the results, or at least learn what to do differently next time! 

Saturday, July 9, 2011

Fried Zucchini Blossoms


Fried Zucchini blossoms stuffed with ricotta and herbs

  When I was 19, my father took me with him on a business trip to Florence, Italy.  For four glorious May days he attended meetings while I spent my time wandering and watching, walking and exploring and getting my first taste of la vita bella.  The sun-ripened tomatoes, the creamy gelato, the sing-song beauty of the language and the general atmosphere of good times to be had made me fall hard for Firenze, as so many millions had before me.  On the banks of the river Arno I made a promise to myself then that I would return, and of course I did...   
  On our last evening I joined my father and his colleagues- we were being taken for a special dinner in an undisclosed location.  Just as the sun started its descent in the clear sky, the ten of us boarded a tiny little bus- I had no idea where we might be headed.  We drove over a bridge headed for one of the green hills that surrounded the city and started our ascent.  As we climbed higher I could see the ancient city spreading out below us, the red tiled rooftops and towering cupolas glowing in the late evening sun, rippling and shimmery like a mirage.
  We disembarked in front of a small cottage on the hill and were seated in the garden, under a wooden pergola twined with leafy branches and tiny white tree lights that flickered on as the sky darkened to my favorite shade of deepest blue.  The air was sweet with the scent of grass and flowers, and the stars twinkling above seemed to be winking down at me as the wine was poured and the first antipasti platters came out- fried zucchini blossoms. 
   Being a suburban girl I had little concept that zucchinis grew with flowers, and that this flower was not only edible, but delicious with a delicate zucchini flavor.  Leave it to the Italians…  The petals were a rich orange yellow striped with bright green, and some blessed person had stuffed them with stringy warm cheese and fried them to crisp perfection.  What followed was one of the top five meals of my life, but all I can really remember is the way those blossoms tasted in the Tuscan evening air. 
  On Wednesday I scored a box of beautiful healthy male blossoms with stems (the females grow at the end of the vegetable) and I knew what must be done.  These are great fried crisp on their own, but I stuffed them with ricotta and herbs and coated them in a batter spiced with garam masala.   


Fried Zucchini Blossoms


12-15             zucchini flowers

Batter
1 c                   flour
1t                     salt
1 t                    garam masala
1c                    club soda, cold

Stuffing
1 c                   ricotta cheese
1 t                    lemon zest
                        Thyme, basil
                        Salt, pepper


1.  Remove stamens from inside the flower, being careful not to rip the petals.  You can use a pair of tweezers or even long scissors. 

2.  Mix ricotta with zest, herbs and spices- these herbs came from right outside my window!!

3. Using a teaspoon, fill the bottom of each blossom with a little cheese- be sure not to overfill them!  Remember, a little goes a long way here and too much filling will burst in the hot oil.  Leave the filled flowers in the fridge until you are ready to fry.


4. Mix the flour, salt and spices together, then add the cold club soda and stir with a fork to get the lumps out.  The batter should be runny but thick enough to hold to the blossoms. 


5. Heat vegetable oil in a deep pot to 375° F.  Set up a frying station with the batter and blossoms, and a rack or plate lined with paper towels. 

6.  When the oil is hot you can start dipping the blossoms into the batter and frying them.  I gave a little twist at the top of the flower to keep the cheese in.  Fry until the batter is golden all around.  If the cheese starts to leak out into the oil, it will cause a burnt mess, so fish out the busted ones- you can crisp it later in the oven for a minute or two.

  Ahhh, fried stuff with cheese… is there anything better?


Thursday, July 7, 2011

Sour Cherry Clafoutis

    It’s been nearly six months since my first blog post, back in the freezing winter when I pined away for fresh fruit and veg, wondering if anyone out there was listening or cared.  And now, friends from every corner of the country have been sending me pictures of recipes they’ve tried out, telling me they’ve been following, or commenting on a post… it’s an amazing feeling!  I couldn’t have predicted how much fun it would be to share pictures and stories, and I’d never have kept up with it if not for all the words of encouragement.  So for those of you out there reading this, thank you for sticking with me so far!  
  Back in January I was dreaming of market stalls bursting with produce, and well, the season is truly upon me now.  My newest flip flops are already well broken in and I’m up to three shower days and strictly up-do’s.  And with the summer stench of garbage ripe in the sticky air, it’s a challenge to leave the cool comfort in front of the a/c.  But hey, I’m not complaining- because at the Greenmarket the farm stalls are chock full of color: red orange yellow green, even purple and pink and every shade in between.  There’s more fresh local dirt candy than I can hope to eat, and I’m loving every green leaf, firm zucchini and crunchy radish. 


   And the best part about the summer market has to be the ripe juicy stone fruit- nothing tastes better than a dripping syrupy peach in season or a sweet black cherry warm from the sun.  While most of the year we are restricted to making our pies with rubbery, watered-down IQF sour cherries, for these few glorious months we can get our hands on the ruby-red real thing! 
  What better way to showcase the tart tangy gems of the season than in a creamy clafoutis.  This dessert is so simple and works with any berries or stone fruits, and there is something deeply homey and comforting about it- talk about the way to a man’s heart…  Sweet milk and eggs soak into the cherries, whose sour tang cuts the rich eggy custard in turn.  Served warm, at room temperature or cold, it makes a great treat for breakfast, tea-time, or after a light summer dinner.
 
Traditionally clafoutis is crust-less, baked in a buttered pie plate or even a hot cast-iron pan- but I poured mine into a par-baked tart shell I blind baked with marbles. 


Sour Cherry Clafoutis
1 ¼ cup       milk
¼  cup         cream
3                 eggs
½ cup          sugar
½                vanilla bean
½ cup         almond flour
1 t               salt
3 cups         sour cherries, pitted
1                 9” buttered pie dish or
                   Par-baked tart shell


1.  Wash and clean the cherries and remove the pits.  And don’t go out and buy a cherry pitter either, here’s a guide on how to pop them out with a paperclip!
2.  In a bowl, whisk together the milk, cream, sugar, salt and eggs.  Split the vanilla bean lengthwise and scrape the seeds out into the milk mixture.  If you don’t have a bean, substitute 1 T vanilla extract.
3.  Break up any clumps in the almond flour and whisk it into the milk and eggs (sub AP flour if you need to)

4.  Arrange the cherries in your dish, pour the custard over the fruit and bake at 375°F  until the custard is set and the top is golden brown, about 35-45 minutes.