Inspiration can be elusive; as hard as you might try to find it, ultimately it must present itself to you. Sometimes a new design idea comes to me from the most unlikely sources- the light on a dewy spider web, a scrap of wrinkled wrapping paper, a vine creeping up a chain-link fence… Other times it’s a bit more obvious.
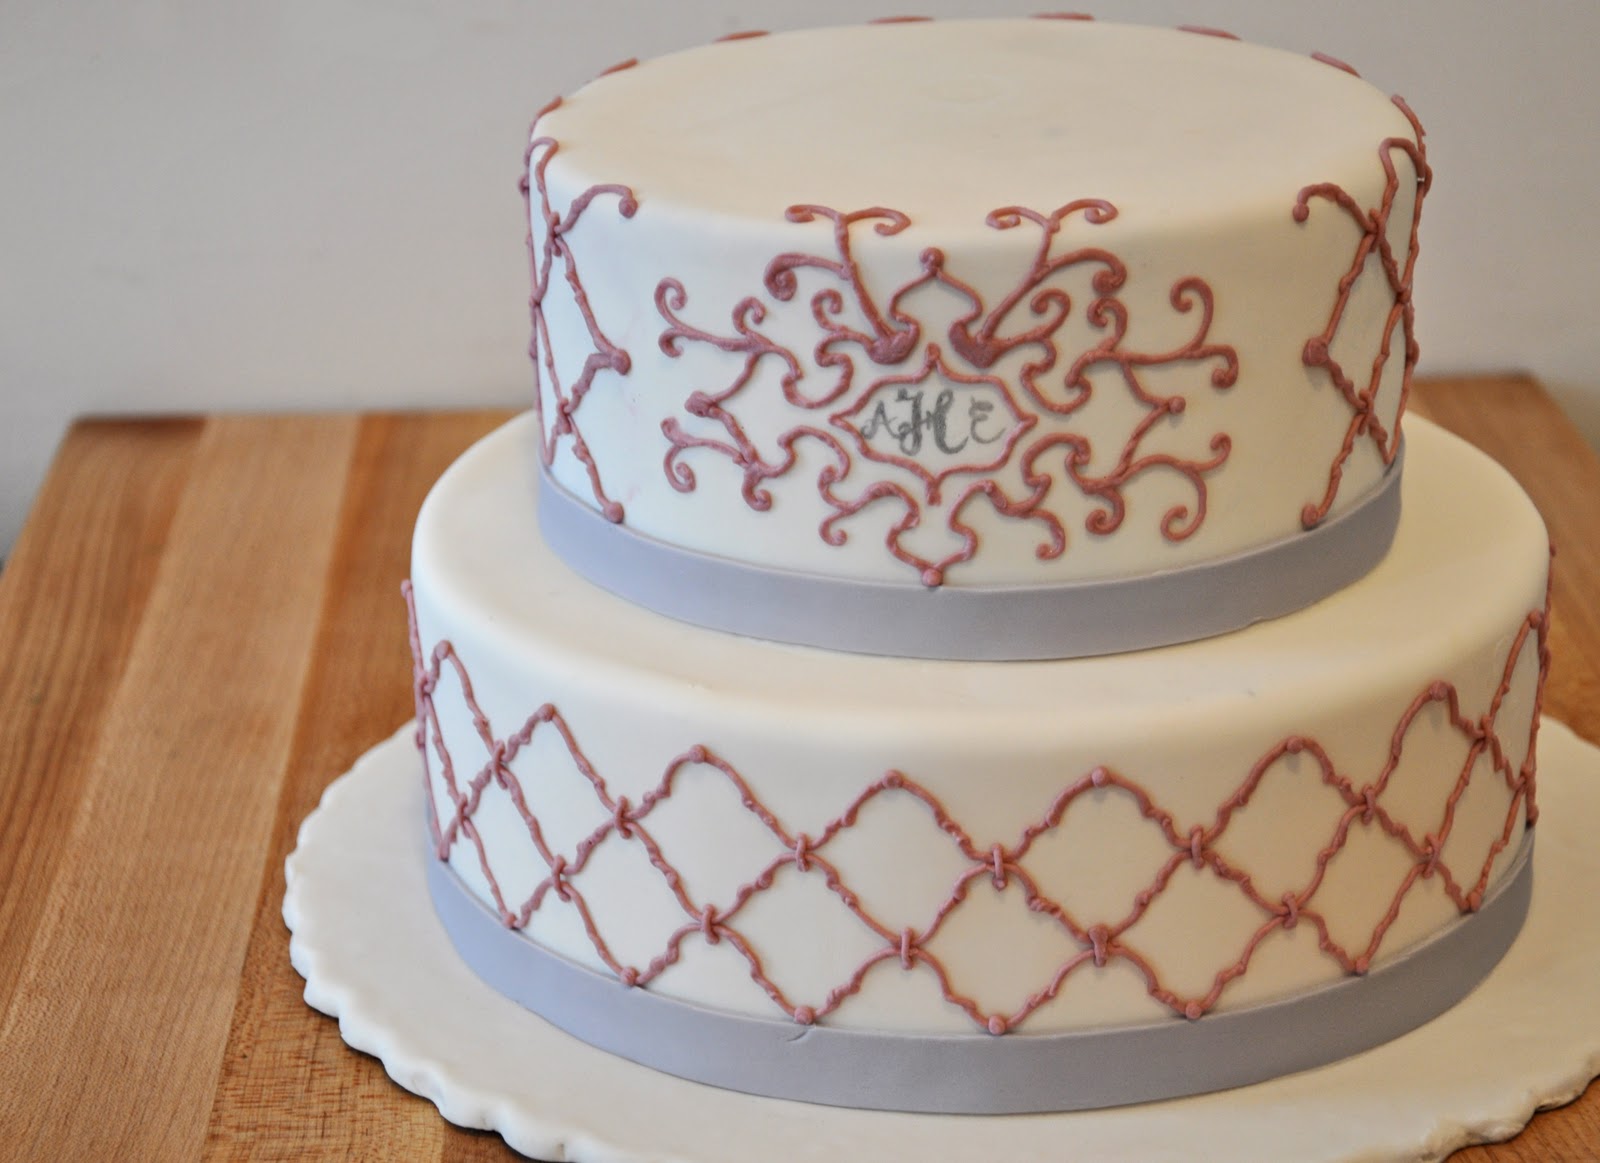
I love it when a couple comes to me with a point of inspiration, something that really represents who they are together. For this cake, I used the monogram, design and colors from the invitations to create a symmetrical pattern on the tiers.

The bride and I share a passion for Boston Cream Pie, so we came up with this delicious golden vanilla cake filled with vanilla bean custard and covered with a creamy chocolate ganache. After slicing each cake, I piped a line of chocolate around the edge to act as a dam for the filling. Then I spread a layer of vanilla bean custard and stacked three layers of cake.


Next, I used a piping bag filled with ganache to coat the cake, smoothing the sides with a plastic bowl-scraper.


When both cakes were filled and covered, they spent the night chilling in the fridge. At every stage of building a tiered or sculpted cake, I work in and out of the fridge so that the frosting can harden before I move on to the next step.
The next morning, I pulled the cakes out and covered them with a thin layer of white fondant. Fondant is a soft sugar dough that I roll out and lay over the cakes like a blanket. It’s not necessary for every design, but I prefer covering my cakes with fondant- it makes my life a lot easier since it holds in the frosting and remains a dry surface to decorate on.
These days, folks seem to have strong opinions about fondant thanks in no small part to the multitude of TV shows featuring cakes. I always tell my couples that fondant is a purely aesthetic thing- there are certain looks you just can't achieve without it. It won’t add to the flavor of the cake, but it certainly shouldn’t take anything away from it as long as you are using a good quality product. I have found Satin Ice makes a fantastic fondant without that waxy, unappealing aftertaste.
Once the cakes were covered, I used a small cake pan to mark the top so that I knew where to place the dowels.


Dowels are a vital part of building a stacked cake, and a step that cannot be missed. Imagine a beautiful cake sitting out at a party, the frosting slowly softening as it comes to room temperature… if there is no internal support for the tiers, what will prevent it from falling over or caving in on itself? Nothing! Too many people think making a wedding cake is a simple as piling a few cakes on top of each other, but without those people I guess there would be no Cake Wrecks...


I used royal icing to secure the tiers and to fill in the seams- this gives the cake a clean and finished look.

The trickiest part about this cake was matching the colors to the original invites. I pulled the color of the text for the slate-gray bands, then filled a piping bag with a dusty lavender royal icing for the pattern.


I scanned the invite and blew up the image to fit the cake, then printed out the pattern to create a paper stencil. Then, I secured the stencil to the cake and marked the points with a very small needle- this would serve as a guide for piping the intricate pattern.


Using water and a fine brush, I smoothed any points and bumps in the icing.

Finally, I pulled the monogram image from the invite and piped the outline onto the center of the top tier, then filled in the details with the piping bag. I used a silvery-gray edible paint to inscribe the initials.


Vanilla Bean Custard
This custard is delicious served warm over a piece of cake, or chilled in cups and topped with whipped cream.
2 cups whole milk

½ vanilla bean*
½ cup + 2 T sugar
2 Tbs corn starch
6 egg yolks
2 oz butter, cold and cubed
pinch salt
1. Combine the milk with 2 T sugar in a heavy-bottomed pot. Cut vanilla bean lengthwise and scrape out the seeds with the back of the knife, then add the seeds and pod to the pot. Bring milk to just under a boil, then cover and remove from heat. Allow it to steep for 20-30 minutes. This will extract the vanilla flavor.
2. Meanwhile, whisk together the remaining sugar, salt and cornstarch in a bowl.
3. Once the milk is steeped, strain it to remove the pod and any fibers- the seeds will remain. Add about ¼ c of the milk to the sugar/starch until it is liquefied, then add the yolks and whisk until smooth.
4. Temper the eggs by adding the milk to the sugar/egg mixture a bit at a time, whisking in between each addition. Doing this will bring the eggs to the same temperature as the milk without allowing them to curdle.
5. Return the custard mixture to the pot and cook gently over a medium-low flame, stirring constantly with a whisk. After 4-5 minutes (depending on your pot), you should see the custard start to thicken. At this point, beat the custard vigorously to prevent lumps. Soon, you will notice the custard bubbling
6. Keep whisking vigorously, using the whisk to scrape the sides and bottom of the pot. This is hard work, but a great workout for the upper arms. The custard must “boil” for 1 minute to cook out the starch flavor, so set a timer if you have one.
7. As soon as the minute is up, immediately remove the pan from the heat and pour the custard into another container so it will not continue to cook. Stir in the cubed butter- this will give the custard a shiny look and a silky mouthfeel. *If you can’t find a vanilla bean, you can use vanilla extract instead. Add 2 T at this stage.
Store in the fridge for up to three days, cover with plastic touching the surface of the custard to prevent it forming a skin.
No comments:
Post a Comment